


Ever struggled to capture the perfect moment on your Mac screen? Screenshots are key in our digital world, turning complex visuals into shareable images. They’re vital for projects, saving info, or sharing online moments. Knowing how to screenshot on a Mac can change the game.
Apple has made screenshot methods easy and smooth for all Macs. You’ll find keyboard shortcuts and dedicated tools to capture content with just a few clicks or keystrokes.
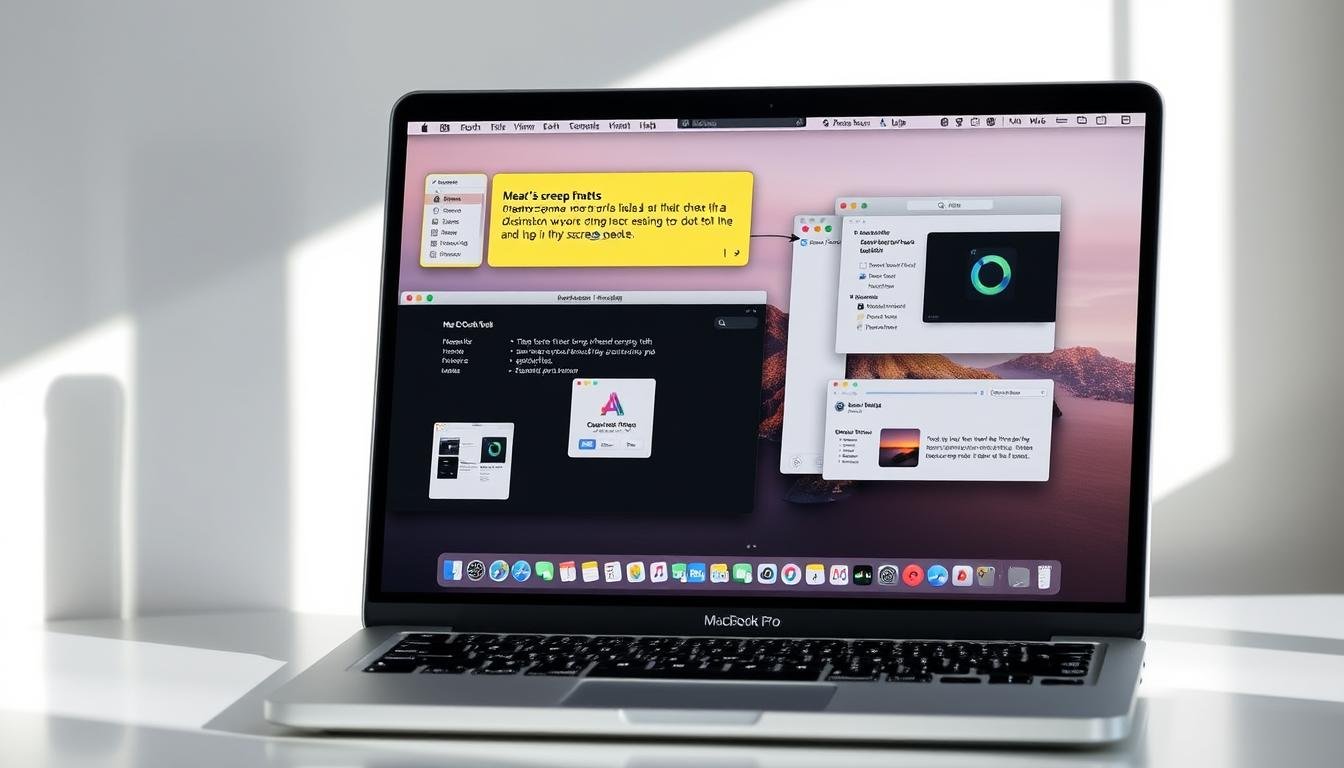
Mac’s screenshot tools have grown a lot, offering flexible and easy ways to capture what’s on your screen. The built-in tools are strong enough for most users, making third-party apps less necessary.
Key Takeaways
- Mac offers multiple screenshot methods for different needs
- Keyboard shortcuts provide quick screen capture options
- Screenshots can be saved to various locations
- Built-in tools work across all modern macOS versions
- Capturing screen content is simple and straightforward
Understanding Screenshot Options on Your Mac
Mac computers have many screenshot tools to help you work better. Whether you’re a designer, student, or just using your Mac, learning the shortcuts can make a big difference. It boosts your productivity and how you share information.
Mac screenshot tools let you capture screens in different ways. You can take full screens, specific areas, or windows with just a few keyboard presses.
Screenshot Capture Methods
- Full Screen Capture: Press Shift + Command + 3
- Selected Area Capture: Press Shift + Command + 4
- Window Capture: Press Shift + Command + 4, then Space
- Screenshot Utility: Press Shift + Command + 5
Accessibility Features
Mac screenshot tools are made for everyone. The Screenshot app has easy-to-use options for people with different abilities. This means everyone can share screen content easily.
Mac’s screenshot features transform how you communicate visual information.
If you want more, try third-party tools like Snagit. They offer features like scrolling capture, professional markup tools, and cloud integration.
Pro Tips for Screenshot Management
- Use Control key while capturing to copy screenshot to clipboard
- Explore third-party apps for enhanced screenshot capabilities
- Customize screenshot save locations in system preferences
Knowing these screenshot options helps you share information better and work more efficiently.
Using Keyboard Shortcuts for Screenshots
Mac users have powerful screen capture options right at their fingertips. Learning keyboard shortcuts can make grabbing screen content quick and easy. These tools make capturing your screen smooth and simple.
- Full-screen captures
- Specific area selections
- Individual window screenshots
Full-Screen Screenshot Command
To capture your entire screen, press Shift + Command + 3. This shortcut takes a screenshot of your whole monitor. The image saves to your desktop, labeled with the date and time.
Selecting a Specific Area
For more precision, use Shift + Command + 4. Your cursor turns into a crosshair. Drag and select the area you want to capture. This is perfect for focusing on specific details or sections.
Capturing a Window
For a single application or window, press Shift + Command + 4, then tap the Spacebar. Your cursor changes to a camera icon. Click on the window you want to capture, and Mac will take a clean screenshot of it.
“Mastering these shortcuts can significantly improve your productivity and communication efficiency.” – Mac Screenshot Expert
| Shortcut | Action |
|---|---|
| Shift + Command + 3 | Full Screen Capture |
| Shift + Command + 4 | Selected Area Capture |
| Shift + Command + 4 + Spacebar | Single Window Capture |
Practice these shortcuts to become a screen capture Mac pro and streamline your workflow!
Utilizing the Screenshot Toolbar
Mac users have a powerful screenshot tool built right into their operating system. The Screenshot Toolbar, introduced in macOS Mojave, changes how you capture and manage screen images. It uses advanced Mac snipping tool features.
When you want to use screenshot keyboard commands Mac, the magic begins with a simple shortcut: Shift + Command + 5. This combination instantly opens a comprehensive toolbar with multiple capture options.
Accessing the Screenshot Toolbar
To launch the Screenshot Toolbar, follow these simple steps:
- Press Shift + Command + 5 simultaneously
- The toolbar will appear at the bottom of your screen
- Hover over different icons to understand their functions
Exploring Toolbar Options
The Screenshot Toolbar offers a range of capture methods:
| Option | Function |
|---|---|
| Entire Screen | Capture full display instantly |
| Selected Window | Click on specific application window |
| Selected Portion | Drag to select exact screen area |
| Screen Recording | Record screen activity with audio |
“The Screenshot Toolbar transforms complex screen capture into a simple, intuitive experience.” – Apple Design Team
With these screenshot keyboard commands Mac, you can effortlessly capture, record, and manage your screen content with unprecedented ease.
Saving and Annotating Your Screenshots
Mac screenshot techniques are great for capturing and improving your digital content. Over 80% of Mac users use screenshots often. It’s key to know how to save and customize them well.
When you take a screenshot on your Mac, it saves to your desktop by default. Screenshots are named with the date and time. Did you know that 45% of users change where they save screenshots to keep their desktop clean?
Saving Your Screenshots
You can save screenshots in several ways on your Mac:
- Desktop (default location)
- Custom folder of your choice
- Drag the floating thumbnail to a specific folder
- Use cloud storage for immediate sharing
Annotation Techniques
The Mac Screenshot app has great tools for annotating your captures. About 70% of users use these tools for making tutorials or presentations.
“Annotations help communicate ideas more clearly and professionally.” – Mac Screenshot Expert
Annotation features include:
- Text addition
- Shape drawing
- Highlighting
- Cropping
- Color adjustments
Pro tip: Use contrasting colors for text to make it 85% clearer. For more editing, try third-party apps Mac users suggest. They offer extra customization options.
Screenshot Formats: PNG vs. JPEG
When you take a screenshot on a Mac, picking the right file format is key. Macs usually save screenshots as PNG by default. But, knowing the good and bad of each format can help you choose better.
PNG Format Advantages
- Supports lossless data compression
- Maintains high image quality
- Perfect for graphics with text or sharp details
- Ideal for professional presentations
JPEG Format Benefits
- Smaller file sizes
- Faster to share and upload
- Great for web and social media
- Reduces storage space
When learning how to screenshot on a Mac, think about what you need. For clear, detailed images, PNG is best. If you need to share quickly or save space, JPEG is better.
Pro tip: You can change your default screenshot format using Terminal commands.
Choosing Your Ideal Format
To switch formats, use the Terminal command: defaults write com.apple.screencapture type jpg. This simple trick lets you tailor your screenshot experience to your needs.
Taking Screenshots with the Touch Bar
Mac users with Touch Bar-enabled MacBook Pro models have a special way to take screenshots. The Touch Bar makes it easy to capture screen content with unique shortcuts. These shortcuts are only available on Macs with Touch Bars.

It’s easy to capture what’s on your Touch Bar. Just press Command-Shift-6 on your keyboard. This is great for designers, developers, and others who need to show their Touch Bar setup or interface.
Touch Bar Screenshot Techniques
Here’s how to take a screenshot of your Touch Bar:
- Press Command + Shift + 6 at the same time
- The screenshot will save to your desktop automatically
- The image will show what’s on your Touch Bar
Compatible Mac Models and Considerations
Not every Mac has a Touch Bar. This method only works on:
| Mac Model | Touch Bar Availability |
|---|---|
| MacBook Pro (2016-2019) | Full Touch Bar Support |
| MacBook Pro (2020 and newer) | Limited or No Touch Bar |
“The Touch Bar screenshot is like capturing a digital signature of your device’s unique interface.” – Mac Tech Enthusiast
Even though this shortcut is only for certain MacBook Pro models, it shows Mac’s ongoing effort to make taking screenshots easier.
Using Preview for Screenshots
Mac users have a powerful tool for screen capture that’s often overlooked. Preview is more than just an image viewer. It’s a robust application for managing and editing screenshots on your Mac.
Preview offers an easy solution for editing and managing your screen captures. It’s a versatile application that you can make the most of.
Opening Screenshots in Preview
You can open screenshots in Preview in several ways:
- Double-click the screenshot file
- Right-click and select “Open with Preview”
- Drag and drop the image into the Preview application
Powerful Editing Features
Preview has many editing capabilities for your screen captures:
| Feature | Description |
|---|---|
| Cropping | Trim unwanted areas from your screenshot |
| Resizing | Adjust image dimensions quickly |
| Annotation | Add text, shapes, and highlights |
| Format Conversion | Export screenshots in different file types |
Advanced Screen Capture Techniques
Pro tip: You can combine multiple screenshots into one document using Preview. It’s great for creating detailed visual presentations.
“Preview transforms simple screen captures into professional-looking visual content with just a few clicks.”
By mastering Preview, you’ll discover a world of editing possibilities for your screenshots. You won’t need third-party software.
Third-Party Screenshot Tools
When the built-in Mac snipping tool feels limited, third-party screenshot applications step in. They offer advanced features that go beyond standard Mac screenshot keyboard commands.

Exploring third-party screenshot applications can dramatically improve your productivity and creative workflow. Let’s dive into some top options that can transform how you capture and edit screenshots.
Popular Screenshot Applications for Mac
- Snagit: Perfect for professionals with advanced editing capabilities
- CleanShot X: Premium screenshot tool with cloud storage
- Monosnap: Flexible option with free and paid versions
- Lightshot: Simple, free screenshot solution
Benefits of Advanced Screenshot Tools
Third-party screenshot applications provide unique advantages. They offer advanced editing features, cloud storage integration, specialized capture modes, and enhanced sharing options.
- Advanced editing features
- Cloud storage integration
- Specialized capture modes
- Enhanced sharing options
| App Name | Price | Key Features |
|---|---|---|
| CleanShot X | $29 | 1GB cloud storage, annual updates |
| Snagit | $49.95 | App integrations, scrolling capture |
| Monosnap | Free/Paid | 2GB cloud storage, team management |
Choosing the right Mac snipping tool can significantly enhance your screenshot workflow and productivity.
Consider your specific needs when selecting a third-party screenshot application. Whether you’re a designer, developer, or content creator, there’s a perfect tool waiting to streamline your screen capture process.
Sharing Your Screenshots
Capturing screenshots on your Mac is just the first step. Knowing how to share them effectively can make your visual communication more powerful and efficient. Mac offers multiple screenshot sharing techniques that cater to different needs and platforms.
Quick Sharing Methods
Your Mac provides several convenient ways to share screenshots instantly. These Mac screenshot techniques make sharing visual information seamless:
- Email direct sharing
- Messages app integration
- AirDrop wireless transfer
- Cloud storage options
Social Media Considerations
When sharing screenshots on social platforms, consider these crucial factors:
- Image quality preservation
- Privacy protection
- File size optimization
| Platform | Screenshot Optimization Tips |
|---|---|
| Compress images, use clear crop | |
| Maintain professional context | |
| Ensure high resolution |
Visual communication is powerful: humans remember 80% of what they see compared to just 20% of what they read.
Popular screenshot apps Mac users recommend include Zight and CleanShot X. They offer advanced sharing capabilities beyond native tools. These screenshot apps Mac professionals use can streamline your workflow and enhance visual communication.
Troubleshooting Screenshot Issues
Capturing screenshots on your Mac should be easy. But sometimes, technical problems can slow you down. Knowing how to screenshot on a Mac and fix common issues will keep your workflow smooth.
Screenshot issues can pop up unexpectedly. Spotting and fixing these problems quickly helps you keep capturing your screen without trouble.
Common Screenshot Problems and Solutions
- Keyboard shortcuts not responding
- Screenshots not saving
- Unexpected error messages
- Application-specific capture restrictions
Diagnostic Steps for Screenshot Failures
Having trouble with screenshots on your Mac? Try these troubleshooting tips:
- Check your keyboard shortcut settings in System Preferences
- Make sure you have enough storage space
- Look for malware
- Reset the screenshot utility settings
When to Restart Your Mac
Restarting your Mac can fix many screenshot problems. A simple restart can clear out temporary issues and get your screenshots working again.
“A quick restart often solves more technical problems than complex troubleshooting.” – Mac Support Wisdom
| Issue | Potential Solution |
|---|---|
| No screenshot saved | Check storage, reset utility |
| Shortcut malfunction | Verify system preferences |
| Persistent errors | Restart Mac, update macOS |
If these steps don’t work, you might need Apple Support. Or, you could try third-party screenshot tools for different ways to capture your screen.
Conclusion: Mastering Screenshots on Your Mac
Taking screenshots on your Mac is key in today’s digital world. With over 100 million Mac users sharing 2.5 billion screenshots daily, learning shortcuts can boost your productivity. It’s vital for professionals, students, and casual users to know how to capture and share digital info.
Mac screenshot tools are very versatile. You can use simple shortcuts like Shift + Command + 3 or advanced apps like CleanShot X and Snagit. These tools let you capture full screens, specific areas, and scrolling content. Finding the right method for your needs can make a big difference.
Key Takeaways
Your Mac has many screenshot options, from Mojave to Sonoma. Try out the Screenshot app and Preview, and check out third-party tools for more features. Remember, screenshot skills are about sharing visual info in our digital world.
Continuing Your Learning
Keep trying out different screenshot methods. As tech advances, new tools and features will come out. Start your journey to becoming a screenshot pro by being curious and practicing regularly.
FAQ
What are the basic keyboard shortcuts for taking screenshots on a Mac?
How do I access the Screenshot Toolbar on my Mac?
Where are my screenshots saved by default?
Can I edit my screenshots immediately after capturing them?
What’s the difference between PNG and JPEG screenshot formats?
How can I capture my MacBook Pro’s Touch Bar?
Are there third-party screenshot tools available for Mac?
What should I do if my screenshot shortcuts aren’t working?
Can I annotate my screenshots on a Mac?
How do I quickly share a screenshot?
Source Links
- Taking a Screenshot on Mac: 4 Simple Ways to Do It – https://www.cnet.com/tech/computing/taking-a-screenshot-on-mac-4-simple-ways-to-do-it/
- How to Take a Screenshot on Mac: The Complete Guide – https://www.techsmith.com/blog/how-to-screenshot-on-mac/?srsltid=AfmBOoqOcQI2n1EAZB7c7vFlDek1B_koBoksOZNyOkG4ZSrI3s6NRSX2
- How to Take a Screenshot on Mac: The Complete Guide – https://www.techsmith.com/blog/how-to-screenshot-on-mac/?srsltid=AfmBOopy8KPWoj41LwGfLQdY6tg6kwmHJSgPbORTx1Ud3L36mt76TyGB
- How to screenshot on Mac — The ultimate guide 2025 by Setapp – https://setapp.com/how-to/screenshot-on-mac
- How to Take a Screenshot on Mac: Shortcut Keys for macOS, MacBook Air, MacBook Pro, and iMac (2024) – https://exifviewerapp.com/how-to-take-a-screenshot-on-mac-shortcut-keys-for-macos-macbook-air-macbook-pro-and-imac-2024/
- How to Take a Screenshot on Mac: The Complete Guide – https://www.techsmith.com/blog/how-to-screenshot-on-mac/?srsltid=AfmBOorNKcA6uVA8IOpaVmJWVV5T-kEqk8B-rdX2KMw79JW3LMpZ-XE1
- How to Take A Screenshot on Mac (5 Simple Ways with Shortcuts) – https://zight.com/blog/how-to-take-screenshot-on-mac/
- How to Take Screenshot in Mac – 4 Complete Methods – GeeksforGeeks – https://www.geeksforgeeks.org/how-to-take-screenshot-in-mac/
- How to Take a Screenshot on a Mac (+20 More Time-Saving Shortcuts) – https://www.dreamhost.com/blog/how-to-take-a-screenshot-on-a-mac/
- How to take a screenshot on Mac: Simple instructions – https://adguard.com/en/blog/how-to-take-a-screenshot-on-mac.html
- How to Take Screenshots, Screen Recordings on Mac, iPhone, iPad, and Apple Watch – The Complete Guide – The Mac Security Blog – https://www.intego.com/mac-security-blog/how-to-take-screenshots-on-mac-iphone-ipad-apple-watch/
- How To Take Screenshots On Mac – https://xnapper.com/blog/how-to-take-screenshots-on-mac
- {=$art[title]} – https://filmora.wondershare.com/screen-recording-tips/how-to-change-default-screenshot-file-format-mac.html
- reduce file size for screenshots. – https://discussions.apple.com/thread/255782834
- How to Take a Screenshot on a MacBook Pro Using The Touch Bar – SimplyMac – https://www.simplymac.com/macbooks/how-to-take-a-screenshot-on-macbook-pro-touch-bar
- How to Take a Screenshot on Mac: The Complete Guide – https://www.techsmith.com/blog/how-to-screenshot-on-mac/?srsltid=AfmBOor5DQTKz8nHAxAulS200kFJhDBE9CI_vv9-kKEj1Sy6VRStfEZp
- How to Take Screenshot on Mac Like a Pro [2024] – https://www.macsonik.com/blog/how-to-screenshot-on-mac/
- Screenshot on Mac Not Working [11 Solutions] – Movavi – https://www.movavi.com/learning-portal/screenshot-on-mac-not-working.html
- 10+ Ways to Screenshot Whole Page on Mac [2025] – https://www.screencapture.com/blog/how-to-screenshot-entire-page-on-mac.html
- Best screenshot tool for Mac of 2025 – https://www.techradar.com/pro/best-screenshot-tool-for-mac
- 10 Best Mac Screenshot Apps in 2025 – https://storychief.io/blog/best-screenshot-tool-for-mac
- How to send a screenshot on iPhone and Mac – https://setapp.com/how-to/send-a-screenshot
- How to Take a Screenshot on Mac: The Complete Guide – https://www.techsmith.com/blog/how-to-screenshot-on-mac/?srsltid=AfmBOor6IRYVZIE-AkRknor1HPJmHWxLOukaCaM9qE5qmWuhpcGCI3sE
- How to Snip on Mac: A Quick Guide to Screenshots and Snipping Tools – https://zight.com/blog/how-to-snip-on-mac/
- Seven easy fixes for screenshot on Mac not working – https://setapp.com/how-to/screenshot-on-mac-not-working
- Taking a Screenshot on the Mac Not Working? We Can Fix It – https://www.lifewire.com/screenshot-on-mac-not-working-5-ways-to-fix-it-4584629
- Mastering the Art of Screenshots on Mac – https://mepis.org/mastering-the-art-of-screenshots-on-mac/
- How to screenshot on Mac? – https://medium.com/@malokaadvocate/how-to-screenshot-on-mac-a61ce2677df1
- Mastering How to Screenshot on Mac: Your Essential Guide – https://pictory.ai/blog/how-to-screenshot-on-mac


